
Several years ago, I learned how to scribe wood to stone and have been patiently waiting for the opportunity to implement this feature in my own building project. The premise is simple — copy the rough surface of a stone plinth to a wood post for a seamless fit. This gives the impression of a timber or wood post “growing” out of the stone foundation. It’s a beautiful look, used in old building foundations especially in the Japanese “ishibatate” style.
The recent outdoor kitchen timber frame was the perfect chance to implement this technique. Here are the steps for scribing wood to a stone foundation.
The concept of scribing wood to stone is simple. It requires a different procedure than using a uniform and level foundation, so you need to be aware of very precisely laying out and plumbing your posts. With shorter or lighter weight timbers, it’s maybe not that difficult… but since my rough posts were 10′ tall and white oak, I needed some assistance to be able to lift and stage the posts for scribing and fitting.
Building a Tripod Hoist
Before anything, I needed to build a tripod hoist to lift the timbers and stage them for scribing. I settled on the simplest design possible. It’s basically a mount with a heavy duty eye bolt for attaching a block and tackle, and three 14′ legs, tall enough that a 10′ tall post could be stood up while still attached to the pulley.

Simple tripod hoist with block and tackle
This youtube video has a good design that I followed pretty closely.
I bought this block and tackle, which doesn’t have a huge weight rating but is stout enough for this size material.
This hoist can be moved and set up with a minimum of two people.
Laying Out the Foundation
The outdoor kitchen is sited immediately behind our house in an area that was graded earlier in the spring. The kitchen will be surrounded by a dry stone retaining wall, and the floor will be raised slightly with gravel and finished with flagstones.

String lines are essential for precisely positioning the stone plinths and using as a reference for post positions
To get the required foundation height, I dug down and poured a concrete pier to lift the stone plinths so that the bottoms would be flush with the future flagstones. I drilled a hole in the rough center of each stone, and used either all-thread or rebar to help anchor the stone and set it on top of the freshly poured concrete.
(I had intended to use timberlinx connectors on each corner post, but I’ve since abandoned that idea — it’s totally unnecessary to tie down the posts to the stone. Gravity does the trick. It was also extremely difficult to get the hardware positioned just right.)
Note that the stones are not level to each other — that’s not necessary in this type of stone plinth foundation. However, the stone need to be laid out and positioned precisely.

Using the tripod hoist to lift and position oak timbers
Staging the Posts for Scribing
Now came the fun part… staging the posts. This involved lifting up each 200+ lb. white oak timber, and setting it on top of the stone. Then it needed to be plumbed in each direction.

All 6 posts are staged and ready for scribe lines
Once all 6 posts were plumbed, I used my original layout string lines to ensure that they were actually positioned precisely on the stone. As long as the timbers were “kissing” each string line, it meant that they were square to each other and the right distance apart — very important, of course, since this is where each piece of wood is scribed. There’s no shifting timbers around once they’re scribed, and once the posts are part of a bent assembly and raised!

Verifying position of timbers with original string lines
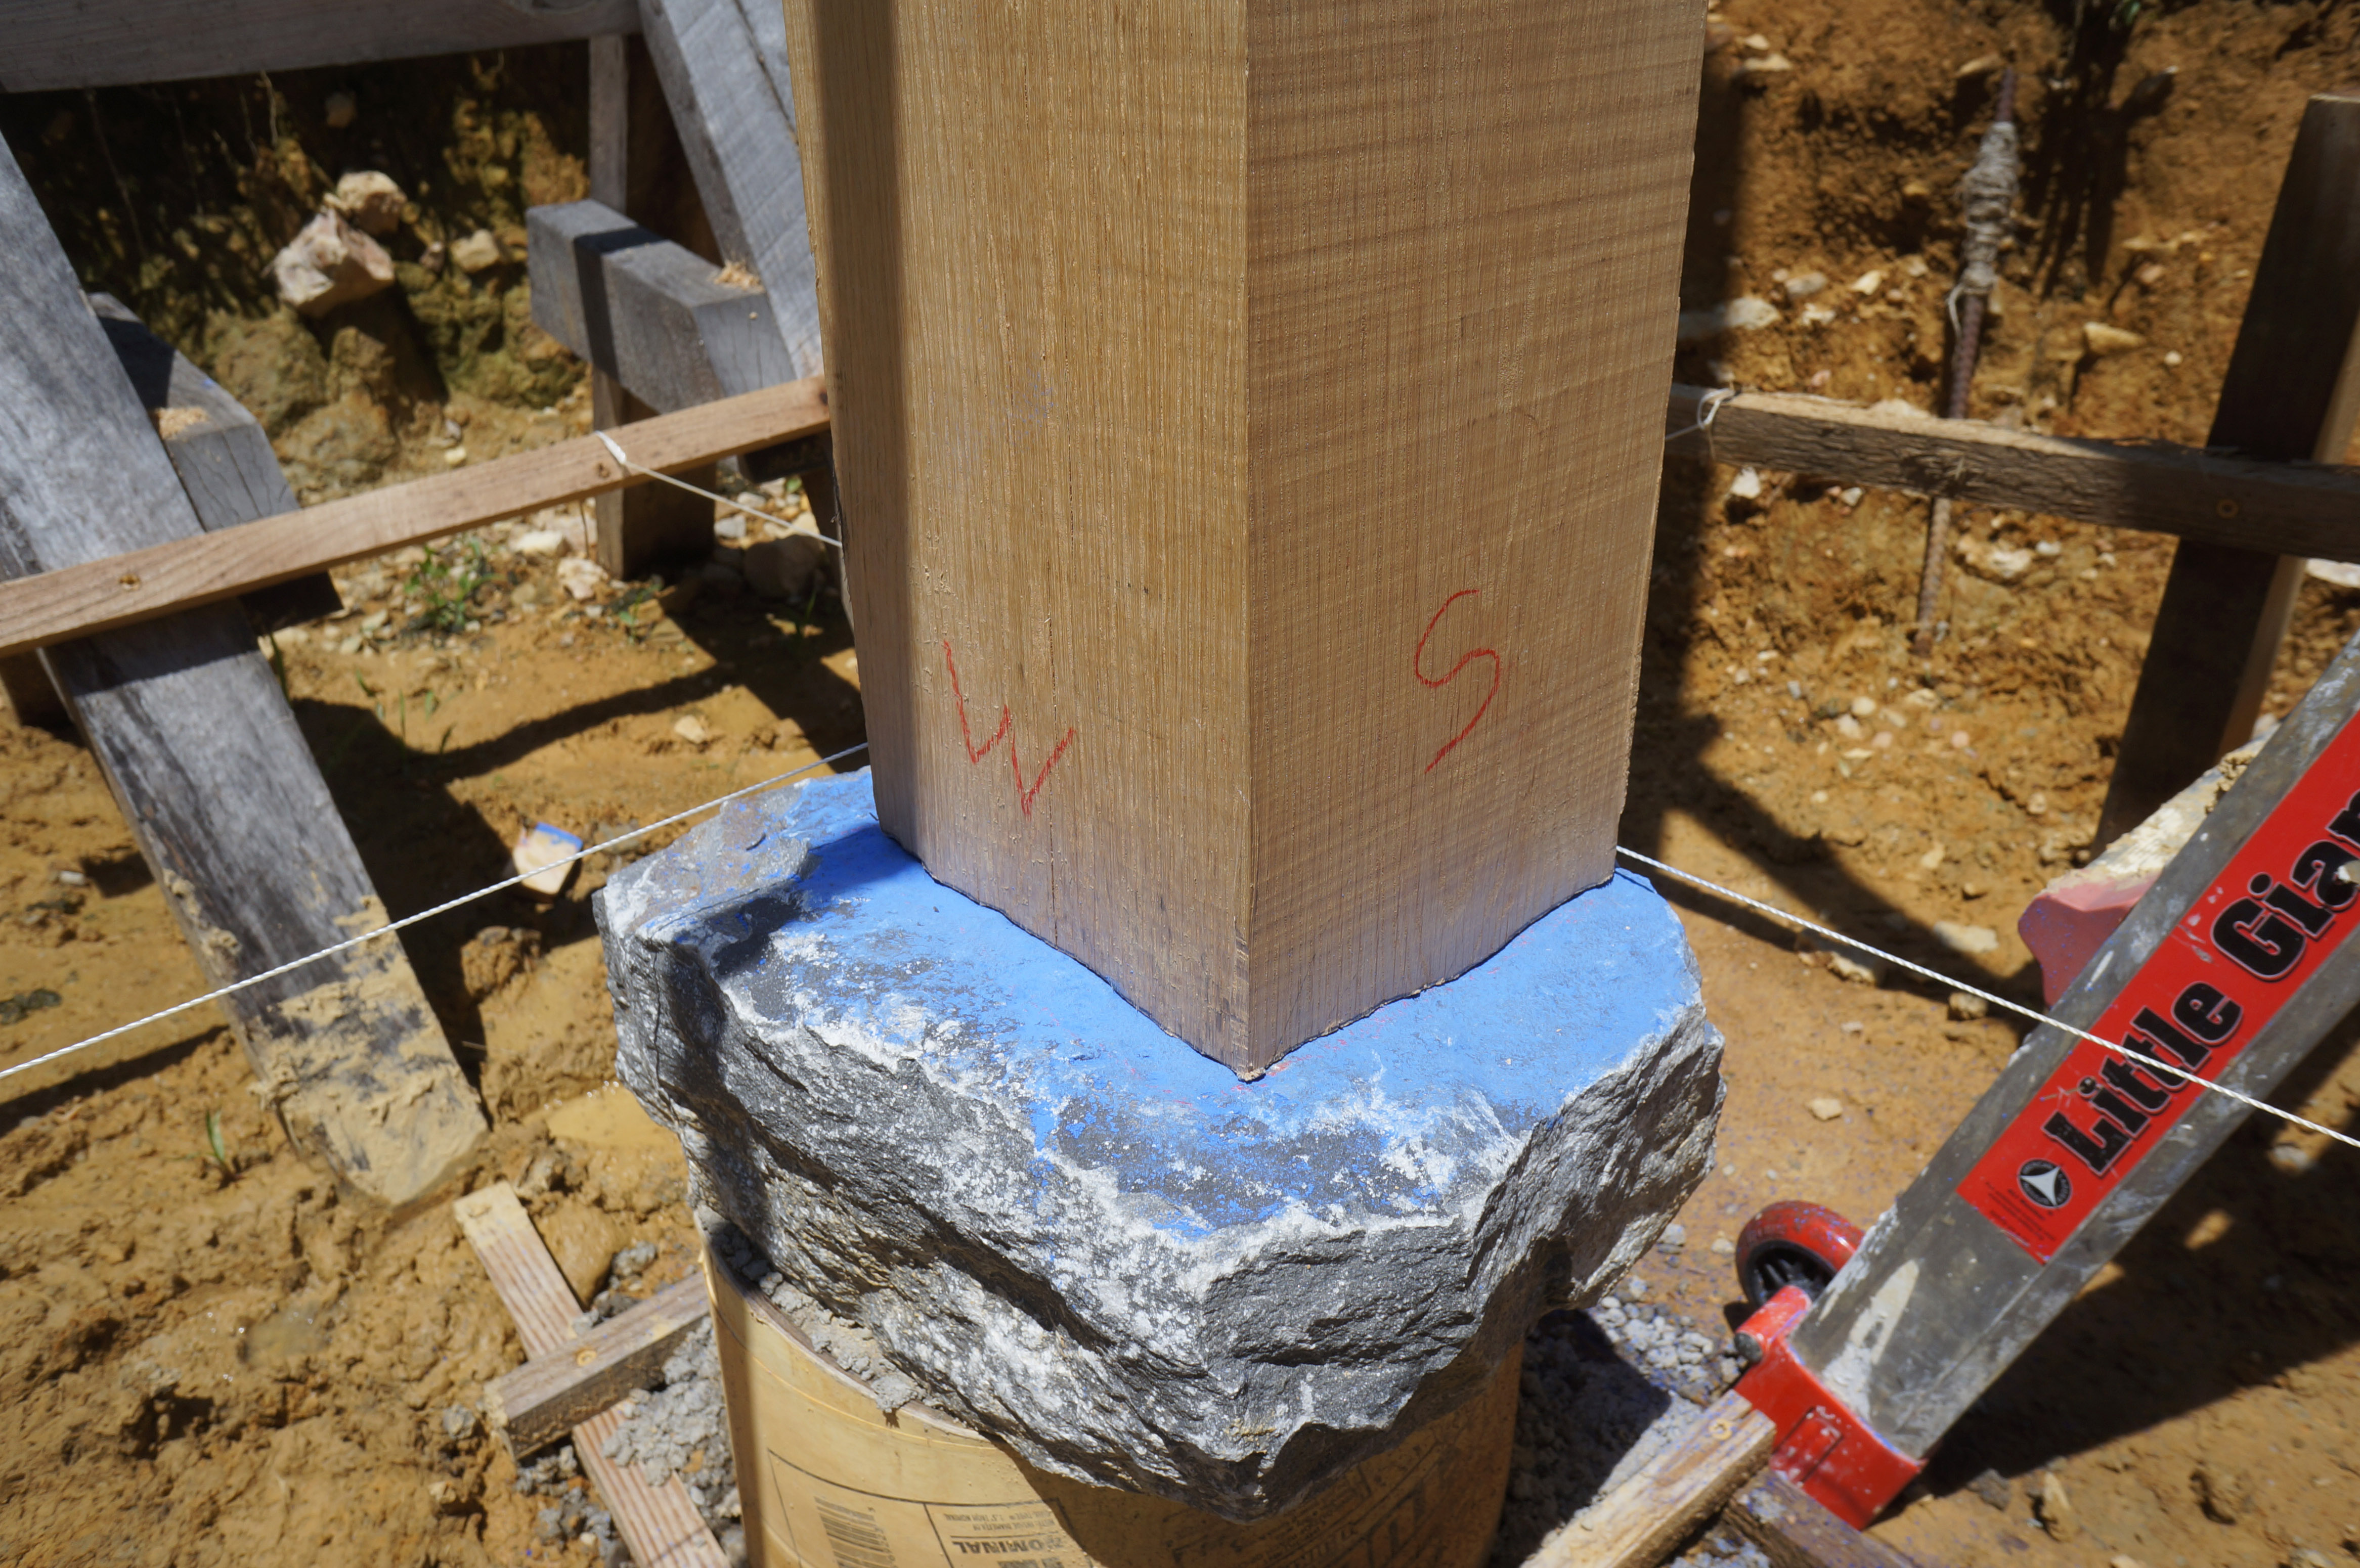
Once all 6 posts were plumbed, squared, and positioned perfectly, I used a compass to trace the profile of the stone to the post. This was by far the easiest part, and took a matter of minutes.

Quick demonstration of using a compass to trace the stone profile to wood
I used a Veritas log scribe, but any old compass will do. One with a pencil and curved point is preferable so that you can get the point exactly in line with the outside of the wood.

Wood post with scribe lines complete
I traced all four sides, and then the posts were taken down to be cut…
Cutting the Post Bottoms
Well, I don’t have any pictures of cutting the post bottoms since I was too wrapped up in the process. In simple terms, it looks like this:
- Cut as close to the pencil line as possible with a saw
- Remove more wood exactly up to the line with one or two different gouges
- Roughly gouge the inside of the post, trying to mimic the profile of the top of stone — this is very difficult to do, but that’s where the next critical step comes in…
Test Fitting the Wood
Once I had a clean cut to my pencil lines, it was time to pick up the posts again. Same process as before, really — with the help of a couple of friends, I used the tripod hoist and lifted each post. If the post bottom was not resting flush with the stone, they had to be lowered and gouged out more deeply.

Chalk on the stone highlights areas to be removed on the wood post
Using chalk on top of the stone helps highlight low spots on the wood post. This process was repeated until there was no visible gap between the wood and stone. In an ideal world, the entire outside perimeter of the wood post bears on the stone.
Finally, the posts were checked for plumb. As the post fit gets closer and closer, they are naturally closer to plumb.
Some were easier than others. Naturally, the stones with more regular surfaces required fewer adjustment to fit. Others required 6 or 8 trials to get just right.
Once all 6 posts fit, I used a laser level to mark a reference line a short distance up on each post. Why? Since the posts don’t have a flush end cut, I needed some level reference line to use for all of the other joinery layout…
Scribing Wood to Stone: In Conclusion
Yes, it’s time-consuming.
But the results are well worth it, I think. Stone plinths looks so much better than the alternative — posts sitting on ugly concrete piers. Since this structure will be highly visible and public, I wanted the deluxe treatment. As always, the deluxe treatment requires the most time.

I should also note that some of the oldest wooden buildings in the world have foundations built exactly this same way. These are some of the most resilient foundations in areas with lots of earthquake activity.
I will definitely be implementing this method on a future project.

Other resources:
I enjoyed the post(s), Ziggy! Thanks for going through the effort to document it. I’m going to be tempted to skip matching up the interior gouging by using some epoxy resin tinted to the stone color. I think resin is rated at 10k lbs psi and it could open up my timber options by sealing the wood/stone connection.
Hey Paul, thanks. I don’t think it’s possible to get a perfect bearing connection on the interior gouged surface. What I learned was that the outside should definitely bear… and depending on the wood, some of the interior will compress (and more will bear). Not sure if that detail is accurate completely, but I would actually avoid a hard seal on the bottom of the wood. It can trap moisture in the wood. More important is a good overhang and a properly shaped rock — any water hitting the stone should slope away from the wood, not towards.