

At last, I’m here to report that April and I finished building our wooden spiral staircase. Over the course of five days, literally up to the day before we left Dancing Rabbit, we installed the risers and treads. The spiral staircase design came from our dearest Tom Cundiff, who instructed us on the layout over the phone and in person during our last Timber Frame Workshop. It took us a while to fully grasp the layout and the flow of things, but once we understood the principles, it went fairly smoothly. Well, the actual building was extremely physically taxing, but I digress.
And so this is our attempt at a DIY wooden spiral staircase. Here’s how we built it.
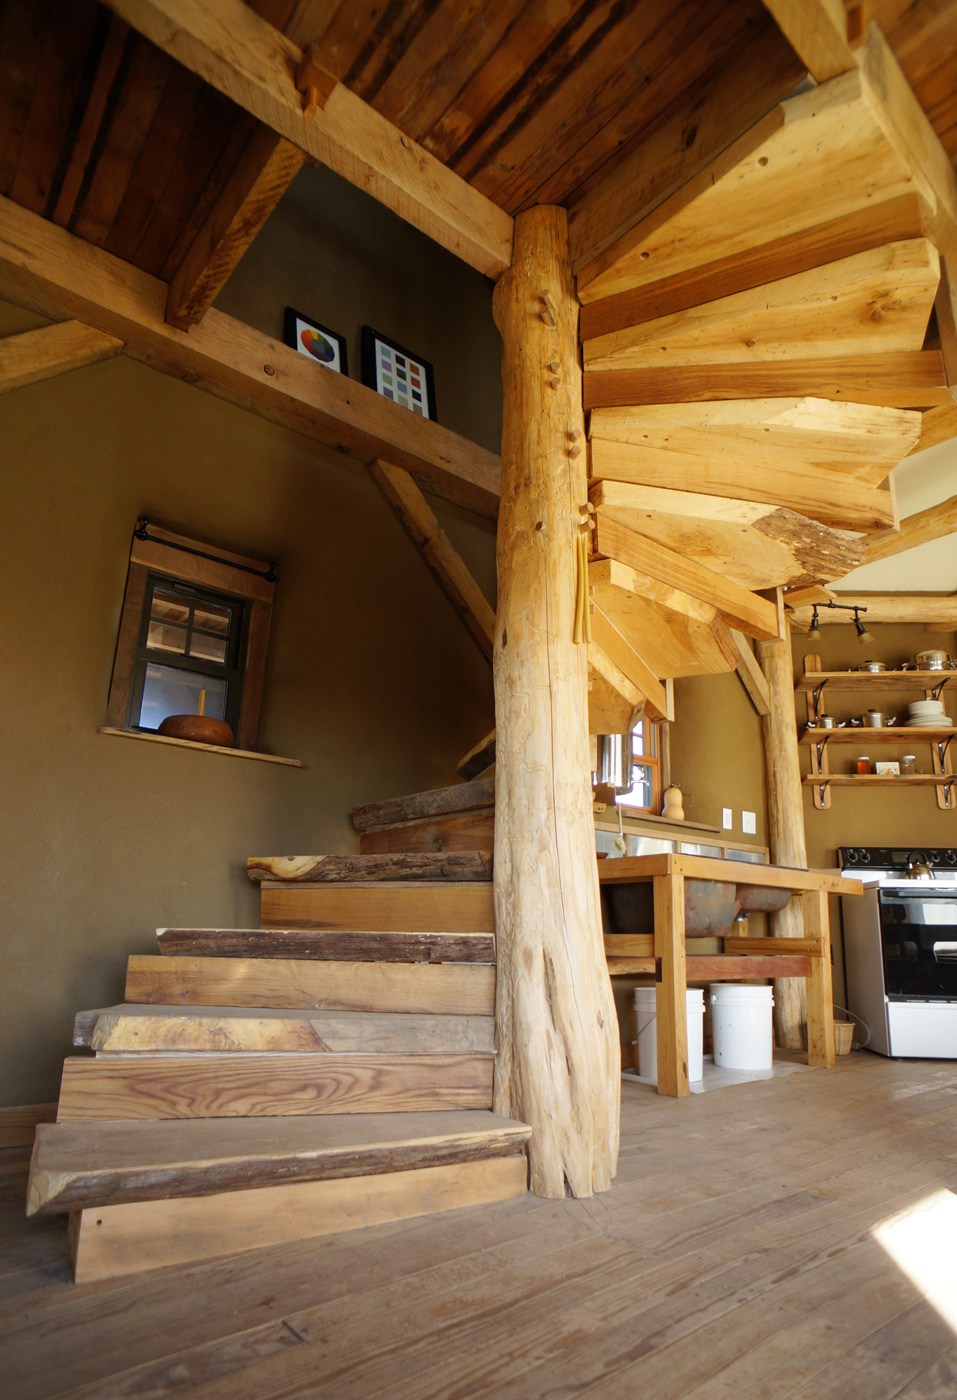
The Wooden Spiral Staircase Design
The three main components of the spiral staircase design are:
- the center post (which bears the weight of everything)
- the risers (which sit in the post)
- and the treads (the actual steps that attach to the risers).
In our case, the center post of the staircase is black locust, perhaps 10-12″ in diameter at the base. Black locust, if you didn’t already know, is an extremely hardy and dense wood. Working this wood is not for the faint of heart. Hoo boy.
Oh, and a note: About that railing (or lack thereof)… well, we didn’t have time to build a rail before moving, but the risers were left long so that one could be designed and installed at a more convenient date.

Using a daisy wheel to determine the layout for the spiral staircase
Laying Out The Spiral
The layout was largely dictated by a daisy wheel with 14 points, drawn on the floor surface itself before the post when into position. (We almost lost the original lines that were drawn last year, but thankfully we were able to trace over the pencil lines with a marker and careful eye.) The daisy wheel has a long and fascinating history all to itself, by the way, but this is neither the time nor place for that. Let’s just say it’s geometrical magic. (See the bottom of this page for a taste of what you can do with a daisy wheel.)
Anyway, the lines of the daisy wheel indicate the angle of the stair risers projecting out of the post, but not necessarily the exact position of the mortises. We had some wiggle room there. Using a level or stick held against the post, I sighted down to the lines and held the level parallel to said lines. Holding the level carefully in position, I moved it either towards or away from the previous mortise, attempting to achieve a consistent spacing, but avoiding the pitfalls of being too close to the edge of the wood as the mortises spiraled around the post.

Drilling 1.5″ holes with a Hole Hawg in the black locust post
Drilling Mortises in the Center Post
When it came time for drilling the mortises, I had to sight down to the floor, using either the bit or chuck of the Hole Hawg as my guide to determine that the drill was parallel to the lines. This was no small trick, as I had to simultaneously hold the drill level, and prevent the dang thing from ripping my arms out from the incredible torque of making 1.5″ holes in black locust.

Freshly drilled, and awaiting chisel work
Thankfully, the drilling got easier by the 11th mortise. On a side note, we were very impressed with WoodOwl’s Tri-Cut Ship Auger bits for drilling into the locust. The chiseling was at times awkward, and downright painful at other times, depending on the position. The bottom-most mortise was an exercise in contortionism.

This isn’t the worst of the positions I had to assume while cleaning up this mortise
Making the Risers
The risers (3×5 oak, in this case) have 6″ long tenons (ideally, when we could drill that deeply), and are seated in equally deep mortises in the post. They’re later pegged with two 1″ pegs into the post. The risers are cantilevered, and ideally the tenon would be even longer, if that’s even physically possible. The risers are a good 36″ long, so the 6″ tenon is bearing all of the weight when the steps are in use. That’s quite a bit to ask. (NOTE: I later reinforced each individual riser because clearly that is too much cantilever for a 6″ tenon to adequately handle.)

Making quick work of the tenons for the risers
These risers were fairly quick to make, as the tenons were pretty small in the grand scheme of things. April sent the 3x5s through a planer so that the two visible faces would be smooth once the tenons were cut out.

The risers in their final positions, awaiting pegs

Pegs secure the risers in the center post, and prevent wiggling
In the event that the mortises were not cut exactly level, we drove small wedges into the mortise under the riser to bring the riser up to level, or even a bit “above” level, assuming they would settle a bit with use. The 3x5s felt quite solid once they were pegged.
Installing the Treads
The wood for the steps (or treads) are storm-felled elm, lovingly sawn up by Tom with a live edge intact. The step stock ranged anywhere from 14 – 18″ wide, and we clamped the stock in position to the riser to see how and where to make our cuts to determine the shape. This was one of the most enjoyable parts, as we could simply slide the wood around to decide what looked good.

April uses a gouge to texture the surface of the stair treads
Once trimmed to size, April used a gouge to create a beautiful, non-slip surface texture. Laborious effort, and gorgeous results. Finally, we could finish the treads with Land Ark (Heritage Natural Finishes) Concentrated Finishing Oil, our sealer of choice.

Finishing the steps with Heritage Natural Finishes’ Concentrated Finishing Oil

The finished treads — cut, gouged, and oiled
As far as fastening the treads went, we used two 4.5″ GRK lag screws to fix the tread to the underside of the riser above. Ideally, we will go back some day and shim between the treads and risers where need be, and hide some screws in the top surface of the tread into the riser.

Note the two screws countersunk in each tread from the bottom side

Another view of installing the risers and treads
Using the Staircase
Walking up and down the stairs, there is no creaking to be heard. There is some movement in the risers, but overall very little. April and I walked up the steps simultaneously, and it fully supported our weight without issue. Like I said, it could benefit from some reinforcement later, but the construction is solid. We made no firm plans to include a railing, though leaving the risers long (extended past the steps) means that someone could retrofit the design later with a railing.
The staircase is a visual pleasure. I hope to have another opportunity to build one again someday. I think the hours of awkward drilling and mortising paid off.
UPDATE: Read my spiral staircase redux post to see how we corrected the eventual settling of the risers almost a year later — now the staircase is more complete, and permanently solidified!

Looking down the steps from above

View from the opposite side of the steps, and small storage space created by the spiral
Absolutely beautiful work Z…
Someone should be really happy to have that in their home!
Regards,
jay
Absolutely beautiful work Z…
Someone should be really happy to have that in their home!
Regards,
jay
Stairs without railings are a fall waiting to happen. Bad idea.
Stairs without railings are a fall waiting to happen. Bad idea.
That is gorgeous work. Nice job guys. That’s the kind of care and effort needed to create objects of beauty and utility that will be treasured for generations to come!
That is gorgeous work. Nice job guys. That’s the kind of care and effort needed to create objects of beauty and utility that will be treasured for generations to come!
Thanks for the comments.
Paul: A railing is not out of the question — there was no possible way for us to build one in time before we left, but we left the possibility open by leaving the risers long (for tying into).
Thanks for the comments.
Paul: A railing is not out of the question — there was no possible way for us to build one in time before we left, but we left the possibility open by leaving the risers long (for tying into).
I did a similar staircase using a telephone pole on my patio to access a sundeck. The tapered pole presents challenges. I only mortised in about 1-1/2″, relying on a bent laminated curved beam around the outside of the risers and treads to support the outside. After laminating the beam 2-1/2″
thick, I cut off the top 6″ to create a handrail spiral mirroring the same curve, attached by steel L-angle hidden by rough 2×2 wood. I knew it would not last forever but it held up 25 years in the weather….finally succumbing to the termites. Building in the round is very much a learning experience!
Beautiful work!
As far as a railing, I’ve been in some confined circular stairs in old buildings (think cathedrals and the like) that instead of a railing they had a strong rope circling the center of the stair. Takes up very little room and I would think the center of a circular stair is already where someone is going to reach for support?
Just food for thought for whoever ends up in this beautiful home! Look forward to seeing what the future holds in your new direction.
This looks amazing!!!! Nice job!
This looks amazing!!!! Nice job!